In this tutorial,I am going to create a New XML Document at Runtime. I will also perform Insertion,Deletion and Updation operation on New XML Document. which are mentioned in below:

Step2:- Go Solution Explorer window->Add New Web Form (Default.aspx)->Drag and Drop Label, Text Box and Button Control from Toolbox -> Change the Control Name as shown in given below"-- First Create XML Document at Run-time
- Update operation is perform at same Document.
- Delete operation is also perform at same Document.
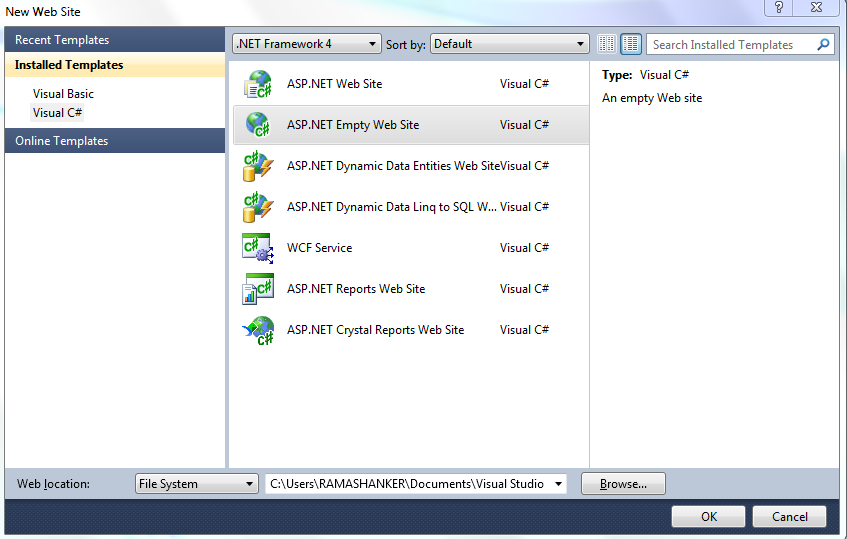
Step1:- First open your visual studio-> go File->click New Website->Select ASP.NET Empty Website-> select C# Language from left window-> click OK.
see it:-
see it:-

Step3:- Now Double Click on Insert Button-> Include the Namespace First which are given below:-
using System.Xml;
using System.Data;
using System.Configuration;
using System.Drawing;
Step4:- Write the following code on insert button click, which are given below:-
1
2
3
4
5
6
7
8
9
10
11
12
13
14
15
16
17
18
19
20
| protected void Button1_Click(object sender, EventArgs e) { XmlDocument xdoc = new XmlDocument(); XmlNode xdeclaration = xdoc.CreateNode(XmlNodeType.XmlDeclaration, null, null); xdoc.AppendChild(xdeclaration); XmlElement xroot = xdoc.CreateElement("Employee"); xdoc.AppendChild(xroot); XmlElement emp_id = xdoc.CreateElement("eid"); emp_id.InnerText = TextBox1.Text; xroot.AppendChild(emp_id); XmlElement emp_name = xdoc.CreateElement("ename"); emp_name.InnerText = TextBox2.Text; xroot.AppendChild(emp_name); XmlElement emp_age = xdoc.CreateElement("eage"); emp_age.InnerText = TextBox3.Text; xroot.AppendChild(emp_age); xdoc.Save(Server.MapPath("~/Employee.xmL"));Label4.Text = ("Data has been successfully inserted & GENERATE the XML FILE at Runtime"); Label4.ForeColor = Color.Red; } |
Step5:- Now Double click on Update Button and write the following code which is given below:-
see it:-
1
2
3
4
5
6
7
8
9
10
11
12
| protected void Button2_Click(object sender, EventArgs e) { DataSet ds = new DataSet(); ds.ReadXml(Server.MapPath("~/Employee.xmL")); ds.Tables[0].PrimaryKey = new DataColumn[] { ds.Tables[0].Columns[0] }; DataRow dr = ds.Tables[0].Rows.Find(TextBox1.Text); dr[1] = TextBox2.Text; dr[2] = TextBox3.Text; ds.WriteXml(Server.MapPath("~/Employee.xmL")); Label4.Text = ("xml data has been successfully updated"); Label4.ForeColor = Color.Red; } |
Step6:- Now Double click on Delete Button and write the following code which is given below:-
see it:-
1
2
3
4
5
6
7
8
9
10
11
| protected void Button3_Click(object sender, EventArgs e) { DataSet ds = new DataSet(); ds.ReadXml(Server.MapPath("~/Employee.xmL")); ds.Tables[0].PrimaryKey = new DataColumn[] { ds.Tables[0].Columns[0] }; DataRow dr = ds.Tables[0].Rows.Find(TextBox1.Text); dr.Delete(); ds.WriteXml(Server.MapPath("~/Employee.xmL")); Label4.Text = ("xml data has been successfully deleted"); Label4.ForeColor = Color.Red; } |
Step7:- See all code which are written in all button(insert, update, delete) clicks and Namespace.
1
2
3
4
5
6
7
8
9
10
11
12
13
14
15
16
17
18
19
20
21
22
23
24
25
26
27
28
29
30
31
32
33
34
35
36
37
38
39
40
41
42
43
44
45
46
47
48
49
50
51
52
53
54
55
56
57
58
59
60
61
| using System;using System.Collections.Generic;using System.Linq;using System.Web;using System.Web.UI;using System.Web.UI.WebControls;using System.Xml;using System.Data;using System.Configuration;using System.Drawing;public partial class _Default : System.Web.UI.Page{ protected void Page_Load(object sender, EventArgs e) { } protected void Button1_Click(object sender, EventArgs e) { XmlDocument xdoc = new XmlDocument(); XmlNode xdeclaration = xdoc.CreateNode(XmlNodeType.XmlDeclaration, null,null); xdoc.AppendChild(xdeclaration); XmlElement xroot = xdoc.CreateElement("Employee"); xdoc.AppendChild(xroot); XmlElement emp_id = xdoc.CreateElement("eid"); emp_id.InnerText = TextBox1.Text; xroot.AppendChild(emp_id); XmlElement emp_name = xdoc.CreateElement("ename"); emp_name.InnerText = TextBox2.Text; xroot.AppendChild(emp_name); XmlElement emp_age = xdoc.CreateElement("eage"); emp_age.InnerText = TextBox3.Text; xroot.AppendChild(emp_age); xdoc.Save(Server.MapPath("~/Employee.xmL")); Label4.Text = ("Data has been successfully inserted & GENERATE the XML FILE at Runtime"); Label4.ForeColor = Color.Red; } protected void Button2_Click(object sender, EventArgs e) { DataSet ds = new DataSet(); ds.ReadXml(Server.MapPath("~/Employee.xmL")); ds.Tables[0].PrimaryKey = new DataColumn[] { ds.Tables[0].Columns[0] }; DataRow dr = ds.Tables[0].Rows.Find(TextBox1.Text); dr[1] = TextBox2.Text; dr[2] = TextBox3.Text; ds.WriteXml(Server.MapPath("~/Employee.xmL")); Label4.Text = ("xml data has been successfully updated"); Label4.ForeColor = Color.Red; } protected void Button3_Click(object sender, EventArgs e) { DataSet ds = new DataSet(); ds.ReadXml(Server.MapPath("~/Employee.xmL")); ds.Tables[0].PrimaryKey = new DataColumn[] { ds.Tables[0].Columns[0] }; DataRow dr = ds.Tables[0].Rows.Find(TextBox1.Text); dr.Delete(); ds.WriteXml(Server.MapPath("~/Employee.xmL")); Label4.Text = ("xml data has been successfully deleted"); Label4.ForeColor = Color.Red; }} |
- See Default.aspx.cs File Which include all codes.

Step8:- Run the Application (press F5), Insert the data and create XML file.
see it:-

- See, XML File and inserted data(output).
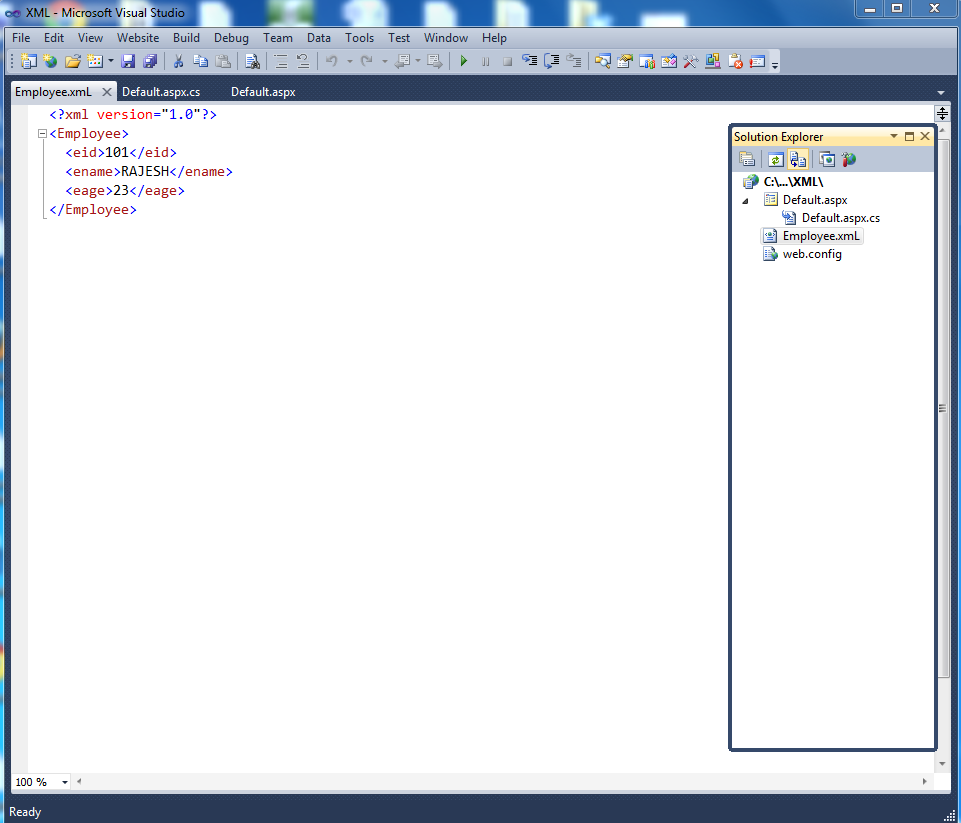
see it:-
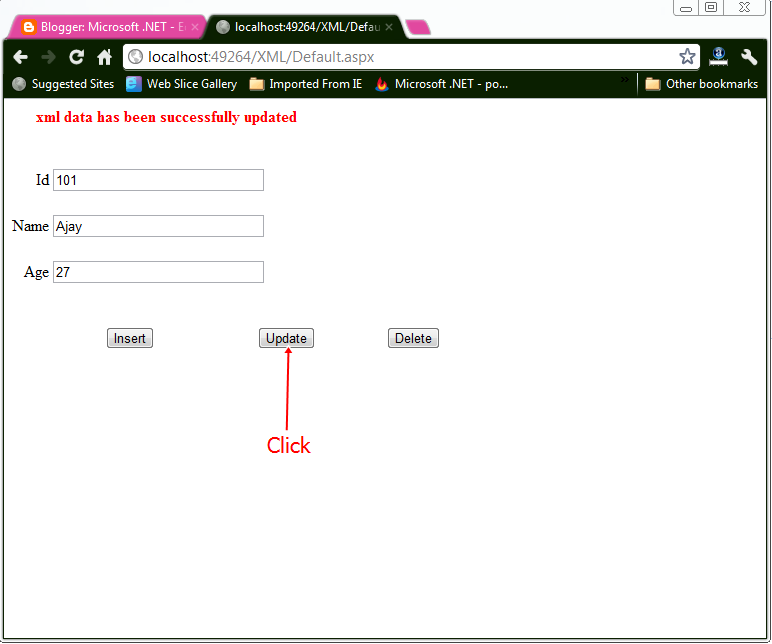
- See the changes in XML File (output):-

see it:-

- See the changes in XML File (output):-

Note:- You have seen that all the operation have been performed successfully.

0 Comments
Post a Comment